


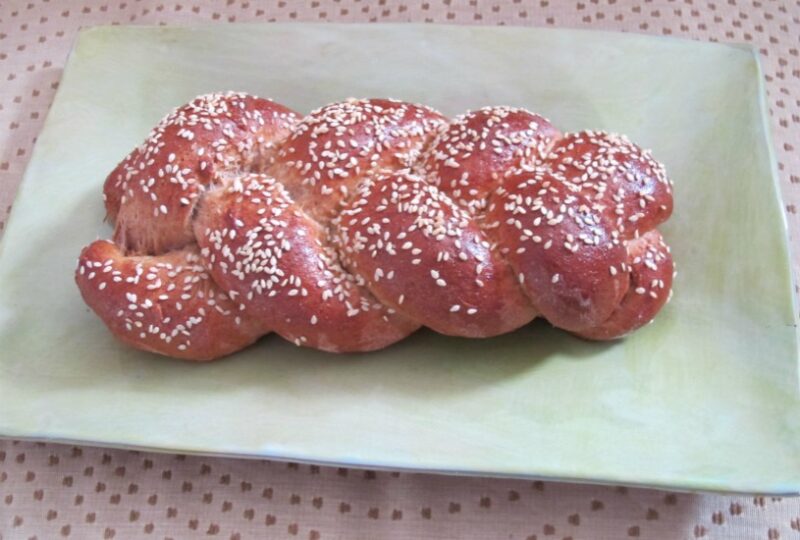
Dry yeast is widely available and sold in large packets. After the first use, seal and store in a glass jar in the freezer. If you purchase the active dry yeast in strips of three 1/4oz. (7g) packets, you will need 5 packets for every 5 pounds (2.25 kg) of flour. When using dry yeast from the refrigerator or freezer, it’s best to bring it to room temperature before using. The main advantage of using dry yeast is that it can be stored in the freezer for up to 6 months.
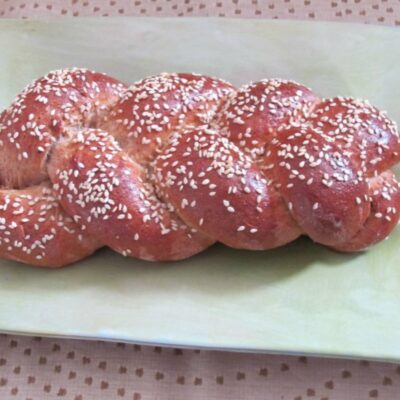
Basic Challah Recipe with Dry Yeast
Servings
8 Servings
Ingredients
- 4 tablespoons dry yeast
- 3 cups 700 ml warm water
- 3/4 cup 150 g organic sugar plus 2 tablespoons organic sugar
- 5 pounds 2.25 kg organic white flour
- 1 1/2 tablespoons sea salt
- 1 cup 230 ml neutral-tasting oil, such as safflower oil
- 2 cage-free organic eggs beaten
Instructions
- In a medium-size bowl, combine the yeast with the 2 tablespoons of sugar and the warm water. Cover the bowl and allow the mixture to start activating. Yeast activation should take about 10 minutes; it will be bubbling and foamy.
- Set 1 cup (125 g) of flour aside. Sift the remaining flour, sugar, and salt into the proofed yeast mixture. Form a well in the center and pour the oil into the well. Combine all the ingredients, using a spatula. When it begins to form a dough, it is time to knead. At this point, you can remove the dough from the bowl and knead on the kitchen counter if it’s easier for you, or knead directly in the bowl.
- To knead the dough: Grab the side of the dough furthest away from you and fold it toward yourself. Fold the dough in half and use your body weight to push the dough into itself. If you find that the dough is sticking too much to the surface and preventing you from kneading properly, dust the dough with flour. Give the dough a quarter turn (90 degrees). Grab the other side and fold it in half. Again, with a lot of weight behind it, push the newly folded half into itself. Repeat this process for 10-15 minutes, or until the dough is smooth, silky, elastic and it does not stick to the surface.
- After the dough is thoroughly prepared, lay it on the counter top while you grease the bowl with a fine layer of oil. Next, turn the dough in the oil several times so that the dough is greased lightly on all sides.
- Cover the bowl with a large plastic garbage bag or kitchen towel and allow it to rise for 1 hour.
- Make the blessing on Hafrashat Challah
- Knead the dough again for a few more minutes and form it into shaped loaves of your choice.
- Cover the loaves again and let them rise in a warm place for 1 hour or until the dough has doubled in volume from its original size.
- If you cannot bake the challahs immediately, then this is the time to wrap the shaped dough in plastic wrap to prevent drying. You can store it in the coldest part of the refrigerator for up to 48 hours. On the day of baking, remove the dough from refrigerator and let stand on kitchen counter until it comes to room temperature, about one hour.
- Preheat the oven to 350* F (180* C). Brush your challahs with beaten eggs and sprinkle with the topping of your choice (traditional choices are sesame seeds or poppy seeds).
- Bake in your preheated oven for about 35-40 minutes, or until loaves turn golden brown and shiny. Bread should have a nice hollow sound when thumped on the bottom.
- Remove from the oven and cool on a rack. Wait at least one hour before serving. If you are freezing the challah, wrap in waxed paper and foil. It can be stored in the freezer for up to 2 months.


The spelt challah recipe for yeast in Spiritual Kneading is actually almost half the amount in the regular challah recipe. So not sure why you say double the yeast. By nature, spelt is a lighter flour and creates a lighter challah.
I noticed in your spelt challah recipe the yeast seems doubled relative to the flour in a regular flour recipe. The spelt flour challahs came out huge and light. I’m thinking of experimenting with the exact same recipe for regular flour. your thoughts? Todah!
Chaya, you are right! There is a typo in the directions. You dont pour water again for step 2. You just pour the oil into the well. If the dough is too dry after mixing, then add more water. Pour 1/4 cup at a time.
I am making this recipe, the basic challah one. You mention using “the water” twice! Once, for the yeast and sugar, and again to pour into a well with the oil. Is there more water than 3 cups that u are leaving out? I mixed the yeast with the 3 cups of water, and was not sure what to do when I got to the part about pouring the water and oil into the well..I had used the water already! Please advise. Just added more water bc the dough was way too crumbly. Email me please. And be more exacting with your recipes in the future! Very frustrating.
It’s in the book of course. You can freeze after it’s completely baked and cooled. Wrap in waxed paper, foil paper and then plastic bag.
Do you have information on how to freeze challah dough before it is baked and at what point to do it?
I am the author of Spiritual Kneading and in the book is extensive research on challah. An interesting fact about eggs in challah is that it was adapted into challah from Germany around the 15th century, as Germans (not Jewish) made a version of challah as well for their Sunday loaves and they had eggs and braided the bread as well.
More traditional are Sephardi Jews who don’t use eggs in the challah at all. The original challah was more like a pita and not cakey.
Not all challah has eggs, that is not a requirement.
I thought challah had to have eggs!