


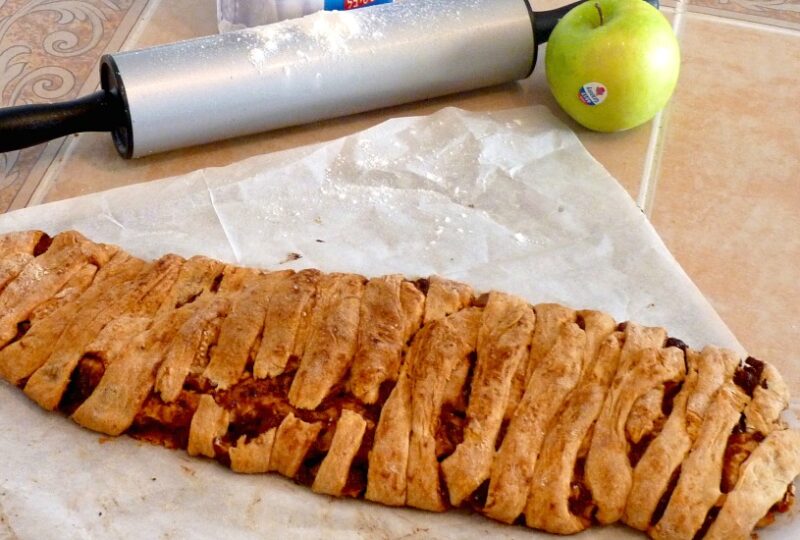
New Year, old classic; well that doesn’t sounds right. An apple danish is standard all over the world, including Israel. In just about every bakery, coffee shop, and mini market you can get some version of this beloved dessert. When you think about an apple danish, you picture the crisp pastry and light and sweet filling. Often the ones we find at our corner coffee shop fall short of our expectations and we convince ourselves that we can’t do better.
But we can, and quite easily.
You can make the dough and filling the night before and set up the cake after the fast ends or bake the day before. Either way, this is a delicious and impressive looking dessert. We don’t have to tell anyone how easy this beautiful dessert is to make.
Easy Overnight Apple Date Danish
Servings
8 Servings
Ingredients
- 1 1/2 cups all purpose flour
- 1 1/4 tsp active dry yeast
- 2 tbsp light brown sugar
- 1/4 tsp baking soda
- 1/2 cup unsalted butter
- 1 tsp fresh lemon juice
- 1/2 cup coconut milk
- 3 Tbsp light brown sugar
- 1/4 cup of water
- 2 Tbsp unsalted margarine
- 3 Tbsp coconut milk
- 1/2 tsp cinnamon
- 1 tsp vanilla extract
- 1 Tbsp cornstarch
- 3 medium apples peeled, cored, and diced
- 4 dates pitted and diced
Instructions
- Combine the first five ingredients of your dough in the food processer until fully combined. Gradually add the lemon juice and coconut milk, mixing for about 2 minutes until your dough is sticky. Cover a bowl with spray oil and place your dough in the center of your bowl. Cover your bowl with plastic wrap and refrigerate your dough overnight.
- The Next Morning:
- Take your dough out of your refrigerator and let it rest for 45 minutes.
- While your dough rests, start working on your filling. Place your first six ingredients into a small pot and let it reach a soft simmer while you cut your fruit.
- Add your fruit to the pot and gradually add your corn flour so that it is evenly dispersed throughout the filling.
- Stir your filling and let it simmer for about 10 minutes or until the liquid reaches a thick syrup-like consistency.
- Lightly cover a flat surface with flour and a touch of light brown sugar evenly over the flour. Place your dough on the floured surface and cover it with a touch of flour and sugar. Knead your dough for about 5 minutes and then roll it into a ball once more. Place your dough back in your bowl, cover it, and let it rest for 30 minutes.
- Take out your dough and place it on the floured surface again. This time roll it out until it is about a foot long and 6 inches wide.
- Now divide your dough into three equal sections horizontally, so that each section is 2 inches in width, and one foot long. Spread your filling generously and evenly across the middle section.
- Slice your two remaining sections with a pizza cutter or sharp knife, creating multiple slits and cutting until about ¼ centimeter from the filling. Make sure to count your slits and try to make each slice of dough equal in width so that they are the same size on both sides.
- Now create the braid pattern by placing a slices of dough from one side across the filling and then the parallel slice from the other side across it. Alternate between sides all throughout your cake until you run out of slices.
- Let your cake rest for 30 minutes and preheat your oven to 400 degrees.
- Bake your cake for 30-40 minutes or until the pastry turns golden brown and flaky.





Leave a Reply