


A very very frequent question I get goes something like this:
“I made a challah dough and it looked good. But after I’ve shaped it and it is on the baking tray, it seems to rise out instead of upwards and the end result is a flat, wide challah that, although it still tastes good, really doesn’t look that nice. What can I do to make them nicer, aside from using a loaf or oval shaped pan?”
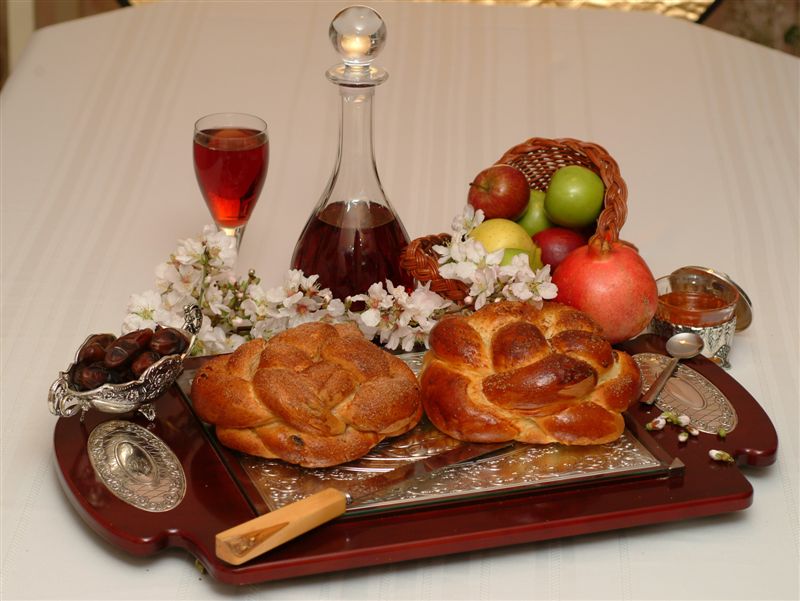
There are lots of reasons a challah could spread out and flatten like that. I’ve been making challah “free form” for years already and I never use any fancy equipment — just a large cookie sheet or oven tray, lined with parchment paper. My challahs of course grow more in the oven, but they grow up, and only spread out minimally, thereby coming out high and beautiful.
A lot of it has to do with the way it’s shaped. A three strand challah will be more flat than a six strand. I spend an entire chapter in my book doing step by step photos and instructions on over 17 different ways to braid challahs, and what the results look like. It’s likewise demonstrated on my professional DVD. All can be seen and obtained on my website.
If they spread like that before baking, it’s often also the dough: is your dough very very soft to handle, almost like cotton? With no real form? Then you need to toughen it a bit more; use a bit less water and a bit more flour. Here’s a good recipe that should hold its form and also come out really good, Quick & Easy Egg Challahs.
Another reason it could be losing its shape, which is a very frequent cause I see people doing, is OVERRISING the challahs after they are shaped. If the challahs are left to rise for over an hour plus, then they will lose their shape or sometimes poof and fall flat during the baking process.
Another good tip is to sprinkle a very small, fine layer of flour over the strands of dough, directly before shaping them. I did it only after I connected the six strands at the top and made sure to leaves the ends of each strand unfloured. It seemed to help, although my usual challahs hold their shape pretty well even without this tip. Try it and see if it helps you, as it has helped many other women.
I just got another great tip from a friend I sat next to at a wedding the other night — if you’d like your egg glaze to look 100% clean without that “drip” look so many of us have, blend the eggs in your hand blender first, then smear them on. The egg wash will go on evenly that way and there are no drips. Next time I make challah I hope to try it out myself and see what happens.
Scroll to continue
More Love

Classic Cholent
The Best Classic Cholent Recipe: Shabbat Morning Comfort, Just Like Bubby Made Growing up, …
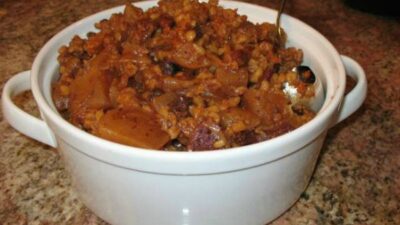
Family Heirloom Cholent
This cholent recipe used to be my hubby’s secret, but I finally got it out of him and now …
Let me know if this helps you!
**Giveaway**
Win a copy of A Taste of Challah and learn all the challah baking tips and tricks for a perfect challah every time. Here’s how to enter:
As much as I love Challah tips, I also love Household tips! It’s almost always one of the first things I will look over in any publication, newspaper or magazine and since I have such limited time for any kind of ‘free reading’, this already says a lot! I’ve gained countless little nuggets of information and useful, practical advice this way over the years and have always wanted to do something with it.
Here’s a cute example just in time for Rosh Hashana, our ‘honey holiday’ seasonal food…
Honey Measuring Tip:
When measuring out honey for a cake or cookie recipe (yes, we’re going to have them up on this site shortly), first measure the oil necessary for the recipe. Then, using the same measuring cup you used for the oil, pour in the amount of honey needed. Because the cup had oil in it first, your honey will just slide right out of the measuring cup, no scooping or sticky-finger trying necessary…
It occurred to me that just as I enjoy these precious little nuggets of information, I’m sure others probably do too – and I would love to be able to share this together!
I would like to compile as many tips as possible, so we can share then with each other. All household, organizational and cooking/baking tips are welcome.
Just post yours in the comments below and I will choose the best ones to put on my website. And one will win the cookbook.
One winner will be chosen by online randomizer from qualified entries only. Must be US or Israel resident of at least 18 years of age. Contest ends September 20th 2011 at 2 pm EST.





I meant to say that the top right corner of fridge magnet corresponds to the rear RIGHT burner (not left).
1. I have several small timers with magnets on the back which I use to keep track of the different things I am cooking, whether in the oven or on the stove.
I put them on the fridge in an organized manner — so that I know which magnet goes with which burner, etc… (top right corner of fridge means, to me, that it corresponds with the pot cooking on the back left burner).
2. I LOVE Sharpie markers to label everything that goes into my freezer. Fyi, they now make them in shiny silver so you can even label black things. I also use blue or red nail polish to mark my milk and meat utensils, pots, etc… If I ever want to remove the nail polish for some reason, it comes right off with nail polish remover. Now I know why they invented bizarre nail polish colors, like blue 🙂
When slicing onion into circles, [after pealing and cutting off the ends], first stand the onion on one of the flat ends, then cut off a little slice. Then you have a flat surface to stand the onion so it doesn’t roll around when you slice!
Thank you for sharing your recipes – I have tried and enjoyed many. Whenever working with sticky foods, I spray Pam on the pots or mixing bowls. Before melting cheese and macaroni, I spray the pot with Pam. Before letting dough rise, I spray my bowl with Pam. I use an ice cream scoop to shape jumbo size cookies, and spray them with Pam and the batter pops right out, and clean ups are so much easier
Keep your refrigerator cookie logs round: just save the cardboard from a roll of paper towels and slit in half lengthwise. Then, when shaping dough, wrap in plastic wrap and store in the cardboard tube. The soft dough doesn’t flatten on the bottom!
My mom has a great way of re-using the water from boiled/steamed vegetables: After the veggies are cooked, she pours the remaining water into a freezer-safe container & freezes. Then, when she wants to make a soup [like split pea, chicken, beef and any other that usually has veggies in it], she has a water base that has a hint of veggie taste, and some added vitamins, to boot!
Fruit flies in the kitchen? Put some cider vinegar and a couple of drops of dish detergent in a cup. The little buggers fly in, but don’t fly out. A fruit fly free kitchen.
My tip is for beauty – use Vaseline as lipgloss and luminizer! It’s so cheap and works just as well.
I always have frozen deboned cooked chicken or sliced beef in the freezer in small bags. They can easily be cut up (very little defrosting needed) and added to stir-fries, sandwiches, rissoto, pasta,pies etc along with frozen or ready sliced vegetables for quick and nutritious meals – my 12 year old can whip up a mean beef Pad Thai in 10 minutes!
when cracking an egg, hit the egg against another egg. only one egg will crack. and you dont end up with the egg white drip all over the counter or the bowl.
A great efficient way to make salads (like coleslaw, broc salad etc) that need to marinate without having to constantly stir them is to make them in large ziplock bags. Instead of getting a spoon dirty each time you want to stir them, all you have to do is flip and shake the bag. and instead of having to wash yet another bowl, toss them when you plate the salad… EASY!
After making a roast, I save some of the juices from the pan and freeze it in quart plastic containers. It is delicious to add a few spoonfuls to chulent. It really adds depth of flavor. When I have saved a full quart, I make my Shabbos daytime meatloaf. I make my usual meatloaf mixture and for each pound of meat, I shape 3 ovals and simmer for 1 hour in the defrosted meat gravy. It tastes moist and very flavorful as the juices from the roast had red wine, onions, garlic and spices that now infuse the chop meat. Remove from gravy, chill and slice for a Shabbos day treat. The gravy that you just used can be refrozen and used again.
Friends call me to diagnose their cooking and baking woes and when they have major baking problems and we’ve gone over the many reasons why their baked goods have failed, the one constant problem that I have diagnosed is cheap flour. I have moved on from the good brand names that you can get everywhere to King Arthur (bread flour for Challah and regular for all else) flour and my usually delicious baked goods and Challah have been upped to the extraordinary category. My friend with the baking problems was teasing me that I spent so much on my Challah flour and I told her it was worth every penny. She had major problems when she used ‘dollar store’ flour that she was so excited to get for a real bargain.
When I make knaidlach in large quantities, I drain them and then place on a foil broiler pan and freeze overnight until solid and then place them in a zip lock bag. Then you can pull out as many as necessary each time you need them.
Jamie…when cleaning oven racks, just spray them with oven cleaner, set them in a plastic garbage bag over night and the next day spray them off with a hose, no scrubing.
When using oil to grease a pan, tilt the oil jar on a napkin and use the napkin to grease the pan. That way you do not over pour the oil, and make your cake pan, for example too greasy. Great tip for regular use. (for Pesach, don’t use, as napkins contain cornstarch-kitniyos Perhaps use Kosher for Pesach napkins along with Pesachdik oil)
Freeze any extra egg yolks left over from other cooking recipes and use to make pate sucree or ice cream without wasting more eggs.
I always keep white vinegar on hand — it’s great for refrigerator pickles or getting the stink out of laundry that sat damp too long (oops!) — I just add about half a cup to a cup per load. Plus, it makes a great cleaner mixed with some baking soda (all that fizzing!). Handy for all kinds of things!
When you need to grease your hands to handle sticky dough,I use a “Pam” like spray to coat the hands instead of shmearing with oil. It also works to spray measuring utensils for measuring honey, molasses, etc and scoops for cookie dough and muffin batter. Slides right out!
Crucial to all of my baking is to use only King Arthur Flour.
To measure molasses or agave measure oil first then the molasses, agave or honey and they will not stick. Another tip I recently learned was to wrap celery in aluminum foil before it is refrigerated. The celery stays fresh.
When using stick margarine for a recipe, keep the wrapper and use it to grease the pan.
When measuring sticky items like peanut butter or Crisco, line the measuring cup with a plastic storage bag and it pops out easily!
I had an abundance of Meyer lemons this year and made preserved lemons from some of them but still had lots left. I squeezed them, made sure there were on pits and put the juice in ice cube trays. Once they were frozen I dumped them all into a freezer bag and presto fresh Meyer lemon juice all year long.
When I have a pot of chicken soup leftover from shabbos, and its already Tuesday, and no one wants anymore, I measure out soup in 1 cup increments and freeze it in sandwich ziploc bags. Its perfect for any recipe that calls for chicken soup stock, or chicken broth!
Two things that I have found to be crucial to excellent challah baking: The first, cannot be stressed enough, and that is to only use King Arthur, Pillsbury, or Gold Medal flour. I had so many challah failures trying to make them with the cheap store brand flours.
The second thing that improved my challahs was to buy a baking brick. The “brick” is about 3/4″ high and sits on your oven racks. I turn over cookie sheets, put a piece of parchment paper on them, and then put my challahs on those to rise for the second rising. When they are ready to go into the oven, I slide the parchment paper with the raised dough right on to the baking brick. Perfectly browned bottoms every time 🙂