
• Skip to main content
  • Skip to after header navigation
  • Skip to site footer
  • Facebook
  • X
  • Instagram
  • YouTube
  • Pinterest
  • TikTok
  • Email Newsletter
  • Shop Our Collection
Tacos ingredients in bowls, top view on wooden table top
JOIN OUR FAMILY
Jamie Geller logo in cursive handwriting gold font

Jamie Geller

Get cooking faster and easier with Jamie Geller as she serves up traditional Jewish, Kosher, and Israeli recipes with tips and hacks that make cooking for your family a breeze.

MEET JAMIE

  • Love Jamie
  • Recipes
  • Menus
  • Holidays
  • Videos
  • Email Newsletter
  • Shop Our Collection

Tacos ingredients in bowls, top view on wooden table top
JOIN OUR FAMILY
MEET JAMIE
  • Love Jamie
  • Recipes
  • Menus
  • Holidays
  • Videos
Home » Blog » Articles » DIY Craft – Utensil Hanger
Articles

DIY Craft – Utensil Hanger

Sweet Paul • May 26, 2014 (Updated: Jul 16, 2019)
FacebookTweetPin
Comment 
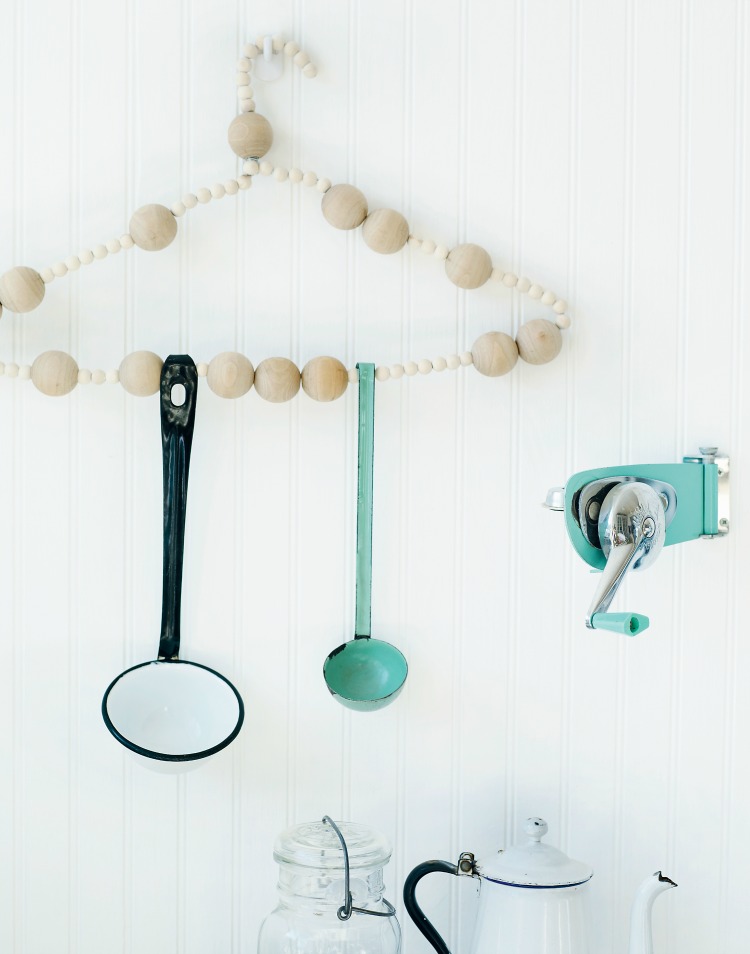
utensil hanger craft

Makes 1 hanger

I love to walk through the aisles of the craft store and hardware store and get inspired by the multitude of different materials. This simple project uses various-sized wooden beads and an old wire hanger that I’ve transformed into an object from which you can hang ladles and other kitchen tools.

You will need:

Wire hanger

Pliers

About 14 big wooden beads

About 63 small wooden beads

Hot glue gun and hot glue sticks or craft glue

Scroll to continue

More Love


OPEN FACED BREAKFAST SANDWICHES

13 Open Faced Sandwiches You Can Pick and Choose

These sandwiches can be assembled in less than 10 minutes and they are perfect for …

Beefed Up Israeli Salad Pg. 54

73 Israeli Food Recipes You Need To Try

Yom Haatzamut is just around the corner (in 2021 it will be celebrated from the night of …


S-hook (available at hardware stores; optional)

1. Untwist the wire hanger. Use the pliers to straighten out the twisty ends of the wire.

2. Thread the beads onto the wire, alternating size from time to time.

3. Once you’ve threaded on enough beads to get up to the neck of the hanger, bring the two ends of the hanger together and thread the remaining beads over both of the wire pieces.

4. Thread the beads all the way to the end and bend it into a hook shape.

5. Using a dab of hot glue or craft glue, seal on the last bead. Allow the glue to set, about 1 minute.

6. Display interesting spoons and ladles from the hanger. If you have a tool to hang that does not have a hooked end, use an S-hook to hang it.
Text credit: Excerpted from SWEET PAUL EAT & MAKE, © 2014 by Paul Lowe Einlyng. Reproduced by permission of Houghton Mifflin Harcourt. All rights reserved.

Photo credit: © Alexandra Grablewski.

Category: Articles

About Sweet Paul

  • View Posts

Reader Interactions

Leave a Reply Cancel reply

Your email address will not be published. Required fields are marked *

Recipe Rating


Trending Posts

HOMEMADE NOUGAT

Soft and Chewy Nougat

Classic Cholent

Classic Cholent

Jamie's Broccoli Kugel

Broccoli Kugel

Sidebar

Top view of raw cooking ingredients on a white table

ENJOY! FRESH AND FREE RECIPES TO YOUR INBOX!

Subscribe
  • Facebook
  • X
  • Instagram
  • YouTube
  • Pinterest
  • TikTok

Related Posts


Ruben Big Kiryat Ata: Home of the Argentinian Burger You Need to Try

Etzel Sabah in Haifa: Not Your Average Skewer shop

Banana Raw Vegan Ice Cream

Why You Need To Try Yogalach in Pardes Hanna: A Café That Feels Like Home

Chalav U’Dvash: The Jerusalem Cafe You Have To Try

Golden Burger: The Jerusalem Burger with Soul


  • About
  • FAQ
  • Shop
  • Book Jamie
  • Press
  • Privacy Policy
  • Terms of Use
  • Contact Us

Copyright © 2026 · Jamie Geller · All Rights Reserved · Powered by BizBudding

Privacy Manager
Jamie Geller logo in cursive handwriting gold font